Welcome!

Hi. I'm Wendy (Wendakai). I'm writing this health-oriented blog because I have colitis and celiac disease and am now on a gluten-free, vegan diet. I went kicking and screaming into that, I can tell you. I'm also at risk for Type 2 diabetes. Mom to an Aspie teen, wife to a working man and in my cronehood, I'm looking to stick around a bit yet and share what I learn with others. There are also other resources posted here for those seeking information on a healthier lifestyle, recipes, info and more. I hope you get something out of what's here. :)

Thursday, April 11, 2013

Please Tell Me You Like Veges

When you're on a vegan diet, you really need to like vegetables.  If you don't, then you're going to be one of those very pale, pasty-lookin' people who really isn't healthy ~ what a friend once called, "a mac n' cheese" vegetarian.

Some people don't care for some vegetables because of the way they've been served in the past.  I get this.  My mom liked her asparagus boiled to within a molecule of its existence.  By the time she was done "cooking" it, all the nutritional value of the stuff was in the water she'd boiled it in.  In fact, my brothers used to drink the asparagus water, so they got the goodness.  What my mom and dad got was limp, soggy green worms, call it the vegetable.  I tried it once.  I didn't try asparagus again until well into adulthood.  It had been grilled with garlic, and I really liked it.  I`ve been cooking it that way ever since and very much enjoying it.

So, sometimes it isn`t the vegetable that`s the problem, it`s the way it`s been presented to us.  My fave way of having veges, is raw.  This is a simple, delicious and healthy way to enjoy veges, especially with hummus.  Ok... here we go again.  I`ll bet you`ve tried store-bought hummus and didn`t care for it.  I get it.  I thought it was a little like dipping my veges into toothpaste.  But you know, it`s easy to make your own.  I have given the recipe for hummus in another post, but I just want to remind people that you can use any nut or seed butter in it that you like.  (Store-bought is almost always made with tahinni, which is sesame seed butter.)  I use Sunbutter, or sunflower seed butter.  I like the flavour and helps me create the creamy hummus that I enjoy.  So remember, you can do any variation on the theme that you like ~ whatever flavour you like (my fave is lemon/dill), whatever consistency you like.  When you are the creator, you can make it they way you like it. :)

Often I make myself a brown rice (gluten-free) pasta to go with a medley of veges and a lettuce leaf filled with hummus for my lunch.  Today I made a sandwich.  This was an idea my daughter came up with, and it's a good one. 

First grill up some mushroom slices.  Portabello mushroom slices are great for this, but today I used crimini mushrooms.  Also throw in some rings of onion.  Cook them the way you like them... from lightly sauteed to crispy.  I prefer them more on the crispy side. 

We use Food for Life brown rice, gluten-free, vegan bread.  Thaw it in the microwave for best results .. to the desired softness. Spread some hummus on each slice.  (No kidding... it works great as a condiment.)  Cover the bread with the mushroom slices and add the onion.  Put on the lid.  Serve with a green salad, or with a medley of raw veges with some hummus for dipping, or with some brown rice pasta salad.  (This is made with veganaise of your choice along with some g-free dijon mustard and suitable seasonings.  I like rosemary and/ or basil, McCormick's garlic powder, salt and pepper. Make it they way YOU like it.)

Just another idea for eating a healthy, yummy plant-based diet. 

I'll give my recipe for hummus again here, for ease of use:

1 can organic chick peas
1 generous dollop sunflower seed butter
at least 2 tbsp. lemon juice (some lemon zest is nice too if desired)
several dill fronds or many shakes of dried dill weed
fresh basil and parsley leaves  (dried is exceptable if you don't have fresh)
salt and pepper to taste (pssst... use lots, and use real salt, not table salt, and coarse ground pepper)
2 or 3 good-sized cloves of garlic

Place all in food processor and whhrrrrrr.... adding water as necessary to get it to the desired consistency.

Give it a try.  Don't be afraid to experiment and make things the way you like them.  I went kicking and screaming into this vegan diet, but the fact is, I have never eaten so well.  A plant based diet is a great way to lower cholesterol, blood pressure, blood sugar, and your weight.  This is not a fad.  It's the way to good health.

Friday, May 4, 2012

More Fun with Black Beans!

The black bean patties I've tried so far were all good, but I am on the hunt for GREAT. I am closer. Last night I added a cup of cooked quinoa to a small can of black beans (drained and rinsed) and mashed. Then I added a tbsp. of GF Worchestershire sauce, salt and pepper, MCCORMICS garlic and onion powder,  a handful of Daiya cheese shreds, 1 grated carrot, about a half cup of sauteed, chopped mushrooms, and 2 tbsp. of ground chia. It still seemed just a little mushy, so I added 1 tbsp. of rice bread crumbs as well. The consistency was just right, so I fried up some patties and some meatballs in garlic olive oil. Yum. I served us each a patty, with homemade red/purple potato salad and creamy coleslaw (both made with veganaisse). It was so good, I had some leftovers for breakfast this morning. :)

This meal was vegan and gluten-free; also free of nightshades.  There are other black bean patty recipes below.  It's been fun to experiment and you can't really "fail," only create patties that you may like either more or less than the last one.  So start with a small can of black beans, drain and rinse them, then experiment with the ingredients and seasonings you like best.  I suggested McCormick seasonings because they are gluten-free... at least, it would seem.  Other seasonings often contain fillers or "natural" flavours that are made with gluten.  If you are gluten-free, please make sure your seasonings and flavourings are as well. (Vanilla extract for instance, is often made in grain alcohol.  That's grain, as in gluten.)

Also try to add some Omega-3 ingredients, such as Chia and/or freshly ground flax seeds.  You can even add protein powder if you can have it.  It will help absorb the moisture of the black beans, and add protein to your vege patty as well. 

Have fun, and enjoy!!

Saturday, January 7, 2012

Meatballs ~ No Meat!

I took a notion to make meatballs, and maybe a veggie patty or two. But, of course, these had to be made with something other than meat. I remembered reading that sweet potato and black beans make a nice mixture, but I couldn't find any recipe. So I decided to wing it. My first effort was a little mushy. I needed a binder, but I don't eat eggs either, and I wasn't that big on GF crumbs. A friend suggested ground flaxseeds. Hey! Good idea! So I tried it.

Here's the recipe... very simple: Saute some chopped mushrooms and a small, chopped onion. Set aside. Into a bowl place 3/4 cup boiled and mashed sweet potato; 3/4 cup canned organic black beans, drained and rinsed; 3/4 cup ground flax seeds; salt, pepper and spices of choice. Now you could use a food processor if you want, but I'm getting tired of washing mine, so I got hold of a sturdy fork and applied elbow grease to mash up the black beans, and then mix everything together.

Get your clean hands in there and fashion meatballs about 3/4 to 1 inch in diameter, and/or fashion a patty or two. (I got about 16 meatballs and one patty out of this batch.) Place into a warmed skillet coated with oil. (I used garlic olive oil.) Cook them on low-medium heat, turning as necessary. Watch them... you want them browned and warmed through, but not blackened. ;o)

Once they're cooked, pack them into a container, cool and refrigerate. (This helps them "set" or firm up.) When it comes to serving, add them to what you want ~ rice, pasta and sauce, potatoes and veges... whatever you like. Just warm them in the microwave and you have a yummy, healthy, vegan addition to your meal that's loaded with fiber and Omega 3. Enjoy!

Now I'm adding more to this post because I made this a couple more times with adjustments, one of which was to make a meatloaf. The first one was good. The next one was soggy. ;p Never one to be hindered by failure, I tried again, making more adjustments and made some giant meatless meatballs. Here's what I did differently: I left out the sweet potato. It is a nice mix with the black beans, but I find that these vary in moisture and too much moisture is a bad thing for meatless meat. So this time I just drained and rinsed a can of black beans and crushed them with a fork, then added the sauteed chopped onions and portobello mushrooms. Into a food processor I put about 3/4 stalk of celery, 3 carrots and 2 cloves of garlic... whrrrrr. All chopped up, I added these to the mixture. Then I put in a tbsp. each of Tamari sauce, GF Worchestershire sauce, and GF hot sauce. (Read the label on your Tamari to make sure it's wheat free. Apparently there are some misguided brands out there.) Then, to absorb that moisture you need the ground flax seed. You can also add some almond "flour" if you like. I also added a couple tbsp. of raw sunflower seeds put through my grinder, and 3 tbsps. of GF flour, and for good measure, a tbsp. of instant onion soup mix, GF of course. (optional) Salt (in moderation, especially if you use the onion soup mix) and pepper, and just a little (optional) Tex Mex spice (being sure that it is also GF). Once all this was thoroughly mixed and a nice, firm consistency, I made giant meatballs and placed them in a lightly greased muffin tin, baked at 350 for about 45 mins.

My plan was to cool and refrigerate them before use, but as soon as they were cool my daughter and I had to try them. They were so good right out of the oven that we each ate one. :)

Don't be afraid to experiment in search of the texture and flavours that you like best. The worst you can do is fail, and failure is just learning.

Friday, January 6, 2012

Simple Gluten-free, Vegan Pumpkin Bread

So, I've been experimenting a little lately... trying new flours and checking out recipes from some new resources... at least, new to me. I tried a couple of things though that definitely belonged in the FAIL column. I had a container of pureed pumpkin in the fridge I wanted to use up and pondered for a moment, then I rejected the notion of another experiment and decided to keep it basic. A pumpkin bread was called for here. A simple, basic, gluten-free, vegan pumpkin bread.


Here's what I did.

Into a bowl I measured: 1 cup whole bean flour; 1/2 cup Bob's Red Mill All Purpose GF flour; 1/4 cup almond flour; 2 tsp GF baking powder; 1/2 tsp sea salt; 1/2 tsp baking soda; 1 and 1/2 tsp cinnamon; 1/2 tsp ginger; about 1/2 cup brown sugar, loose. (You can use another sweetener, but if it's liquid, remember to adjust the liquid ingredients accordingly.)

I stirred up the dry ingredients well, then added: 1 egg replacer; 3/4 cup pureed pumpkin; 3/4 cup organic lemonade. (Yes, you can just use a couple of tbsp fresh lemon juice, either in water, or you can sour the milk of your choice.)

Stir till all the dry ingredients are moistened. Scoop batter into greased loaf pan and bake in a 350 degree preheated oven for roughly 50 minutes. (Ovens may vary.)


No FAIL column in sight here. I wound up with a lovely, moist, spicey pumpkin bread that my daughter, at left buttering a slice, thoroughly enjoyed, as did I, with no butter of course. Makes a great breakfast, as well as a good snack. :)

Enjoy!

Thursday, December 8, 2011

More Easy Meal Ideas

Two comfort foods, a mighty meal.... and a partridge in a pear tree?

A perennial fave for young folk: mac n' cheese. Thing is, my daughter is dairy- and gluten-free, so this mac n' cheese is made with brown rice macaroni and Daiya cheese. It doesn't take long to cook this macaroni... no more than 8 mins, then drain and rinse well. Return to the empty pot, add Daiya cheese (I use a mixture of cheddar and mozz flavours), place pot over still warm burner and stir. Once the "cheese" is mostly melted, add a little butter. Now, this is just basically a plate of starch, so to give it some redeeming nutritional value, I saute some onion, garlic, mushrooms and whatever other veges are handy and mix them in. She doesn't seem to mind. Obviously this is a sometimes, "comfort food" meal and not for all the time. I can count on my daughter to work this off.

Stuffed potato: clean and nuke a nice large potato of choice. When it's tender and has cooled a bit, cut it in half, scoop out most of the potato and put it in a mixing bowl. You can use what you like to cream the potato. I used a little soy cream cheese (soy sour cream works too) to add some protein to it, and a little butter for yum. I also added some Daiya cheddar for flavour and some of those sauteed veges to it as well. I smooshed it all up together and packed it back into the potato skins. Put it back in the microwave and gave it a warming blast before serving.

Last, but certainly not least, the very nutritious fish dinner. Though vegetarian now, my daughter will still eat fish and eggs. These wild salmon fillets went on special at a local store and I stocked up. First I put the asparagus and mushrooms into a pan lightly coated with garlic olive oil, then, after turning them, I added the salmon fillet, sprinkled on top with tarragon and parsley, and a generous squirt of fresh lemon juice. The potato is nuked, just to complete that ol' fashioned "meat n' potato" model.

These are just some of my daughter's faves. All can be made your way or adjusted to your tastes. Bon apetite!

Friday, December 2, 2011

G-free, Vegan Shepherd's Pie


No kidding. Doesn't it look good? It really was.

Now, I'll confesss, wasn't my first try. Just to start with I needed to make my own vege broth.. there's stuff in commercial broth that my daughter can't have. So I loaded carrots, celery, onion, garlic and more into my crock pot, added water, and made broth. Thing is, I didn't have any faith in it. I mean, it didn't have bones, skin and all those animal parts that make a broth strong and rich. So I went ahead and made my first vege shepherd's pie with the broth straight up. Oooo... a little too strong. I made a date to try again.
Segue to yesterday when I rehydrated some shitake mushrooms to put into my vegan lasagna. When I was done, there sat the water I'd rehydrated them in. Oooo, I thought... can't waste that. Hmmm... time to try that shepherd's pie again? Yep.

So into the crockpot it went, along with onion, garlic, carrots, celery, some pieces of sweet potato that I've been experimenting with lately, along with some thyme, oregano and basil, and a couple pieces of asparagus and broccoli as well. This time I didn't underestimate it. When it was done and drained through a sieve, that was strong vege broth. I put some away in the freezer for another time, and treated what was left like a concentrate, adding water, salt and pepper, and using just water to dissolve the tapioca starch that would thicken my "gravy."

Now, first of course, I sauteed just a whole bunch of mushrooms. I really find these are a great replacement for meat in a vegan recipe. I also added some pieces of asparagus to the fry pan, and onion and garlic. Then I added the broth, water, salt, pepper, carrots, broccoli and zucchini. I thickened the whole thing with the tapioca starch. Meanwhile, I had made mashed potatoes, using soy cream cheese and Daiya cheese to cream them, with a little salt and pepper.

I scooped the veges and gravy into the oven-safe ceramic dishes (they have a name, but it always escapes me). Then I covered this with the mashed spuds and garnished with a bit more Daiya cheese shreds. I baked it for a bit, just to melt the "cheese" shreds a little, then turned on the broiler to brown up the top of it.

Mmmmmm.... success! It was really good.

Now, I've been experimenting, as I say, with sweet potato, and I had some already mashed in the fridge I meant to add to the potato on top of mine, to make it a little healthier. But I forgot. When I told my daughter about this she said, "only on yours?!" Hmmm... I told her I didn't think she'd like it... necessarily. But hey, she's up for the experiment too, so next time, I mix sweet potato with regular potatoes on the top of this culinary glory too see how that goes. Sounds good to me. :)

Wednesday, November 23, 2011

Stuffed Peppers, Gluten-free and Vegan!

The first time my husband encountered stuffed peppers was at my Aunt’s house. She liked to make stuffed peppers for company. He loved ‘em. He asked me to make them.

Oy. I had never made them and by the time he asked, my aunt was no longer available to ask for the recipe. I asked a cousin, but I’m thinkin’ he didn’t have the recipe. ;o) So I did the unthinkable... I looked in my favourite cookbook, and there it was! I didn’t know, of course, if this recipe was anything like my aunt’s, but it seemed pretty basic, so I gave it a try. He loved ‘em!

Since then, stuffed peppers weren’t something I made a lot, but at regular intervals, like when the four packs of peppers were on sale at my local grocery store, I’d make them. Everyone in the family likes ‘em, even though my daughter doesn’t actually eat the pepper ... just the stuffing.

Well, recently, green peppers were on special in the four packs again, but our diets have undergone some changes since I first made stuffed peppers. I am gluten-free vegan, my daughter is g-free, dairy-free vegetarian, and my husband just wants the meals he’s always had. ;o)

Ack... it’s like running a restaurant some days. But here’s what I did with the stuffed peppers:

Bring water to boil in a big enough pan to blanche the peppers. Cut off the tops and seed them, then blanche them for about 4 minutes. Remove them from the boiling water and place them upside down on a towel to drain. Using the same pot (to save on dishes... empty out the water; save for vege broth or discard). To stuff the peppers you need:

olive oil
1 small onion, chopped
2 of the pepper tops, chopped
6 large mushrooms, washed, sliced in half, then each half sliced some more
1 - 14 oz. can diced tomatoes
1 tbsp. Tamari sauce
dried basil, to taste, salt and pepper
1 - 250 gram package Uncle Ben’s Bistro Express Wholegrain Brown rice, no preservatives
1 cup Daiya cheese shreds

Preheat the oven to 350 degrees. Coat the saucepan with olive oil. Saute the sliced mushrooms, onion and pepper for several mins. Add the diced tomatoes, tamari sauce, basil, salt and pepper. Simmer for a few mins. Add the rice and warm. Add the Daiya cheese and stir till melted a bit. (Save a few shreds to top the peppers with.)

Place the peppers into a casserole dish. Salt the peppers a bit, then fill with the rice mixture. Put any leftover filling into the casserole between the peppers. Put the few leftover shreds onto the tops of the stuffed peppers. Cover and bake for roughly 30 mins. Remove lid. Allow peppers to rest for a few mins., then serve with whatever else you like.

I served my little stuffed red pepper with a green salad. I served Hubby’s larger green pepper with a meat patty, because he doesn’t really want to be a vegetarian. (I notice he only ate half of his meat though.) My daughter’s larger green pepper was served alone... with some of the extra filling sort of spilling off to one side. Have it the way you like it!

Sunday, November 20, 2011

Portion Control and Presentation

I've always thought serving size and appearance are both very important when preparing meals, and it's something that many food gurus don't bother to mention. Serving size and presentation make a difference, not just in how much we eat, but in how satisfying we find our food.

I recently read a post from a friend who thought she could no longer have a certain food, because after eating a generous serving of it, her blood sugar went too high. The thing is, what would have happened if her serving hadn't been quite so generous, or if it had been served with other food that was just as loaded with carbs?

To the right is a sample of the nutrition labeling on foods. They suggest a serving size, then give facts, such as calories, carbs, sugar, for that size serving. Almost every day I enjoy some brown rice pasta, in moderation. What is "moderation?" It's the serving size suggested on the package, or less. In this case, it's 200 calories worth of brown rice pasta. It's also 4 grams of protein, 1.5 grams of fat, and 43 grams of carbs ~ or 14% of my daily allowable carbs.

It wasn't easy to figure out just how much fettucine this 2 oz. serving size was. So I cleaned off my table and dumped out a whole 16 oz. package, then I divided it into 8 roughly equal servings. No, I didn't count strand by strand, but the bundles of noodles were pretty much all the same size... about the size of a quarter when squashed between thumb and fore-knuckle. (Let's face it... if I cheat one day, I get short-changed on another.) So this is how much fettucine I prepare per serving. Similarly, I measure other pastas in a measuring cup. Once you have it figured out how much is a moderate serving size, cook that much per person each time.

Of course, if I served just that much pasta lightly dressed, it wouldn't be enough. It would be a tiny puddle of food in the middle of my plate... like service in one of those fancy restaurants that serve such a wee tiddle of food in the middle of a huge plate, that you feel the need to go eat out, after you've eaten out. ;p

Hence, presentation. How about some veges and hummus in a lettuce leaf? Or a nice big green salad? (Watch the serving size of that dressing!) Now, you see this picture. Doesn't that look good? Well, it's a nice size plate of food! Of course it's mostly salad, with my own dressing, made with 2 tsps. of garlic olive oil, a tbsp. of my own basil vinegar, pepper, dried parsley, and a tiddle of sea salt. I let the salad sort of spill all over the plate before serving up the 200 calories worth of brown rice macaroni with veges and the merest smattering of Daiya cheese. You see, the serving of pasta looks like more sitting up on top of some of the kale from my salad. So when I put this mighty plateful of food in front of me, it looks good! It looks like a lot of food! And by the time I'm finished this meal, I'm full!

Tips for helping you stay on your diet:
(By diet, I'm referring to a permanent part of your lifestyle, not a temporary exercise in denial done for temporary weight loss.. as it often is.)

Use a smaller plate. I mean, obviously it's going to look like less food than you might think you want if you're using a great big plate. Choose a smaller plate for your food and it will look like more!

Let those salad fixin's fall all over the plate... even under the other food. It'll make the other food look more voluminous, and you'll get to it eventually.

Make your own dressings. Yes, there are nutrition labels on store-bought dressings and you can measure them carefully onto your salad or into your pasta, but making your own with superior ingredients can be just that much more yummy and satisfying, and you can make adjustments as needed, like adding dried tomatoes, or lots of finely chopped garlic when you have a cold, or a bit more basil 'cause you like it that way.

Sure, you're on a restrictive diet because of health issues. That doesn't mean you have to rub your own nose in your food, so to speak. Measure carefully, and make both serving size and presentation a regular part of your diet. Do it for you. :)

Saturday, November 19, 2011

Gluten-free, Vegan Lasagna

Ok, so it isn't traditional. It's yummy and it's healthy and hey, that's what's important. :)

I use a shallow Corningware casserole for this because the Daiya cheese melts better if it's covered as it bakes. Of course, you can always cover any shallow baking dish with tin foil, just so it doesn't touch the food.

I use Rizopia oven-ready, brown rice lasagna noodles. For them to cook through, start with a layer of tomato sauce (of choice) on the bottom. Then place noodles on top and layer your vege toppings. I use sliced zucchini and mushrooms, with leaves of baby spinach and basil for the first layer. Then more tomato sauce on that and a layer of Daiya cheese. Then another layer of noodles and veges... I put mushrooms and broccoli, sometimes also some asparagus, for this layer. Then more tomato sauce and Daiya cheese.

Cover and bake in a 375 degree oven for 45 mins. Serve in gentle servings with a salad. Yum. :)

(And you know, if you eat meat, the recipe police won't come after you if you add some of that too.) ;o)

Saturday, October 29, 2011

It's the thought that counts... here's a thought.

Honestly, I've been debating about where to blog this, because while this blog is for recipes, it's very health-oriented and these two recipes I'm about to share have nothing to do with health... hahahaha. They are, in fact, a little bit sinful in their yumminess. They really aren't for every day, but they are for special meals on special days. They also make fantastic gifts, and this too is what this blog post is about. (I'm going a little bit Martha Stewart-esque today.) I'll link to my creative blog. ;o)

In these challenging economic times, the coming holidays can be as much about stress as about joy, with the expectation many of us have built up around gift-giving. Let's face it, most of us really don't need more stuff. So I give consumables. These are yummies that my gift recipients can feel good about receiving, and even better about enjoying. Once they've been received and enjoyed, they don't have to be stashed in a cupboard like an overbundance of knickknackery or a shirt that's too small and kind of weird-lookin' anyway. Of course, this idea can be accomplished with anything from store-bought fancy cookies, or a basket of goodies, to homemade yums. This past summer I made giant jars of my homemade dills for the dill pickle lovers on my list. That will be accompanied by some jams, jellies and/or some baked goods. For the diabetic on my list, I've lined up some locally-made sugar-free, dark chocolate wafers, which I'll package with some of my own no-sugar-added spread. (Recipes here: http://wshomehealth.blogspot.com/2011/05/no-sugar-added-spreads.html
So, with this in mind, I am sharing these two recipes and some ideas for presenting them.

The first is a perennial favourite: Bread n' Butter pickles. (Yes, these are better than the store-bought ones.) You just need:
3 good size or 4 moderate size English cucumbers
1 large red pepper
1 medium green pepper
1 package of pearl onions
1/2 cup coarse pickling salt
4 cups sugar
4 cups white vinegar
2 tsps. turmeric
2 tsps. mustard seed
1 tsp. celery seed

Peel the onions. TIP: soak them in ice water for a few minutes, slice off the root end, and rub with your thumb. The peel should come off easily.) Wash the peppers and cukes ~ DO NOT PEEL CUKES. Open and de-seed the peppers, slice the ends off the cukes, and discard. Chop the peppers into pieces about 1/2 to 3/4 inch square pieces. Slice the cukes and the onions thinly. Then alternate them into a large colander (place colander inside large bowl), sprinkling each layer with some of the coarse salt, leaving enough to sprinkle over the top after all the veges are in the colander.

Now, you can leave this sit overnight and finish the next morning, or you can put two trays of ice cubes over the veges, cover, and leave it three hours while you get your jars and lids, etc. ready.
(Preparations for preserving are here: http://quillingartandmore.blogspot.com/p/preparations-for-preserving.html )

Rinse the veges thoroughly, and while they are draining some more, place the sugar, vinegar and spices into a large preserving kettle (very large saucepan). Bring this to a boil. Add the drained veges carefully and return to a full boil. Pack into hot, sterilized jars, covering veges with hot syrup.

TIP: Ladle out the veges without the syrup, or much of it, first, to make sure your jars are fairly full of veges. Then bring the syrup to a fresh boil and ladle it over the veges, leaving the 1/4 inch head space from the rim. Wipe and lid.)

This recipe yields about 5 - 6 pints of B & B pickles. Yum!

***

Now this other recipe is a family heirloom, but I'm going to share it anyway. It's different and delish and makes a great gift. You just need a fair sized pie pumpkin, along with:
1 tsp. whole cloves
2-3 inches of cinnamon stick
4 cups white vinegar
4 lbs sugar

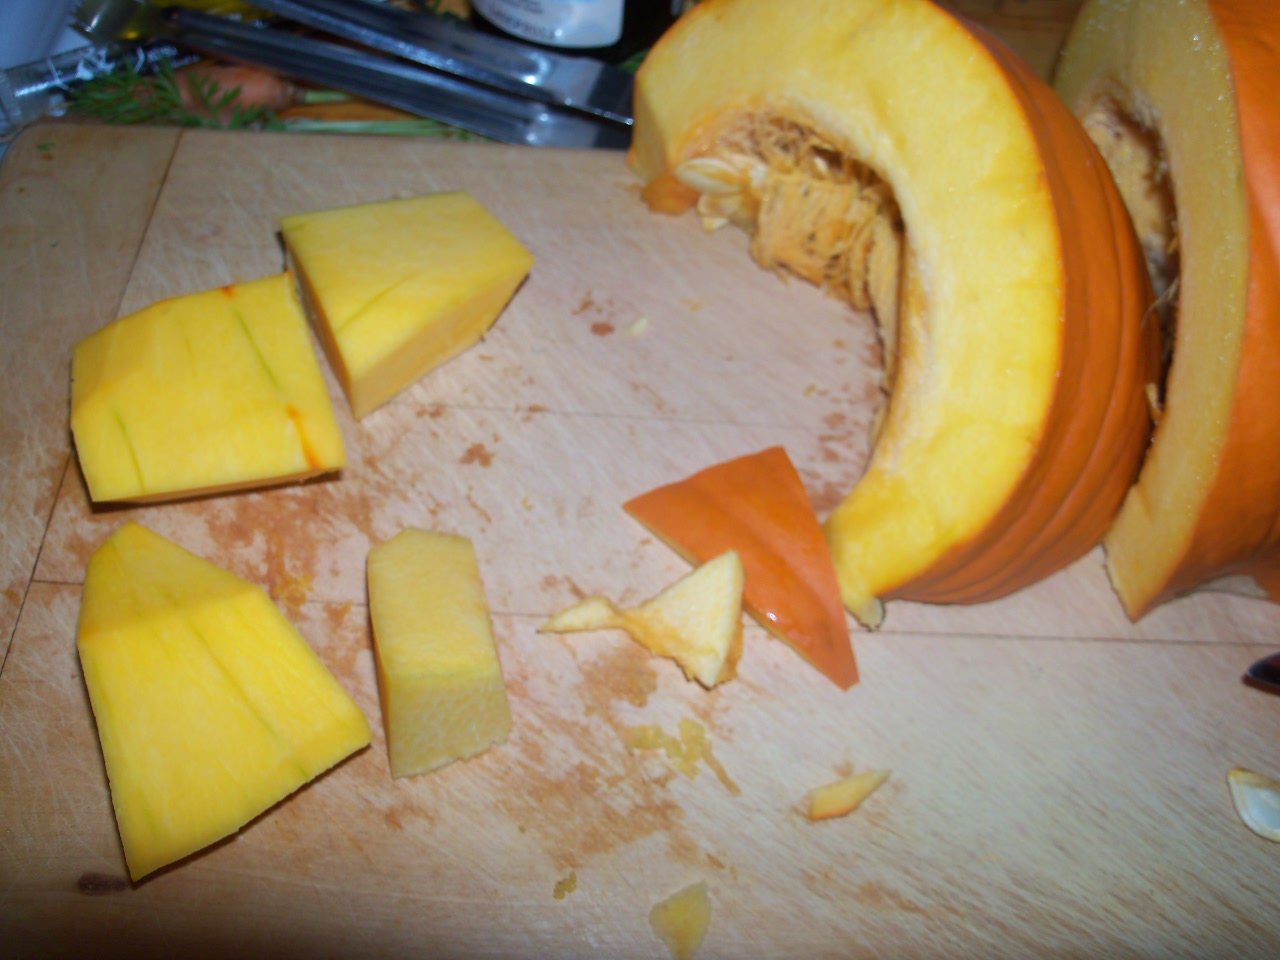
Cut the pumpkin up into about 3/4" cubes, trimming away seed goo and peel ~ discard. Set pumpkin aside in a large bowl. In a preserving kettle or very large saucepan, stir together sugar and vinegar. Place spices into a cheesecloth bag. (Cut a large square of cheesecloth, place spices in middle, tie it into a bag with white cotton thread, cut away excess cheesecloth from the top. This is your spice bag.) Bring syrup to a boil, stirring frequently, with spice bag in it. Simmer, covered, for five minutes. Add pieces of pumpkin... carefully. (Hot syrup burns.)Cover and cook pumpkin in the syrup until it's tender. (Test carefully with a fork.) Using the same fill technique as the pickles, ladle pumpkin, then boiling syrup into sterilized jars and lid.


The recipe makes about 6 1-cup jars of Spiced Pickled Pumpkin.Yummy, fun gift.


Use some wrapping paper ends tied over the top with ribbon, some fabric remnants if you sew, or even a brown paper bag, smooshed up, then flattened out and decorated.. yes, with pumpkin seeds if you like, and tied with jute string for that rustic look.

TIP: don't try to cut a perfect circle if you don't have a pattern. Just cut a square of paper/fabric, place it over the top and trim the way you like it. Hold the cover on with a small elastic before trying to tie ribbon/string attractively. It's easier.

Hope this post at least gives you some ideas! :)

Monday, October 3, 2011

Decadent, healthy dessert!

Picture it... chocolate birthday cake, and it's gluten-free!
Well, it was pertiful, and I hear it was yummy, but I couldn't have any, because there were real eggs in it... and I've been stayin' away from chocolate. Awwwww... po' Wendy. But wait! It's ok! I had an idea. (Get them from time to time.) ;o)

It's apple season and there are all kinds in the house ~ wild apples, our own apples, and apples from market. There are soft apples, medium apples, hard apples... hey, dessert!

Ideally, pick a medium apple, like an Empire, Spartan, Royal Gala for your apple dessert. Core it with an apple corer... like this one.
(This one is very old. If you're looking for one in a store, it probably won't look just like this, but close.)

Stuff the core with brown sugar and raisins, or use syrup, like maple or apple syrup, or even honey. Sprinkle a little cinnamon if you like. (Don't assume those raisins are g-free.. read the ingredients and warnings. I use SUN-MAID raisins.) Now drizzle just a little water into your microwave-safe dish.. really, just a wee bit, and nuke the apple on high for about 3 minutes. (A soft apple, like a Mac, requires less time and may turn to apple sauce. A hard apple, like a Spy, Delicious, or Granny Smith, will need more time, depending not just on hardness, but on size, and just a tiddle more water as well.)


Now, to make it decadent, you need to add some version of "ice cream." I used this.... Rice Divine Coconut Mango. You can use what you use for "ice cream." :) I spooned just a little all around my apple.


So it looked like this! Apple and raisins with cream! No gluten, no dairy, li'l bit o' sugar, Sugar. ;o)


Don't need no silly cake! ;o)


Note: the apple skin can be a bit tough, so either cut it a bit with kitchen scissors to get it started, or use a grapefruit spoon to eat it. It is worth the work.... sooooooo goooooood. :) Enjoy!

Sunday, September 18, 2011

Thanksgiving?! Stuffing and Desserts, Gluten-Free!

Part One: Stuffing, Gluten-Free

I've been pondering stuffing for awhile now, but since Udi's bread became available here, I figured I'd try that first. It's expensive, but my daughter really likes it. Since I don't indulge in bread anymore, I buy it for her. Thing is, like most teens, she isn't really into the crusts. Darned if I was going to just throw them away though, at that price. I figured I'd do something with them... croutons, tiny pizzas, even just bread crumbs.... something. I decided to try them in the stuffing, so I picked out 5 -6 crusts that were pretty good slices, not just slivers of crust. I cut them up into tiny cubes, but you could stick them into a food processor and pulse it too. But you really don't want the bread to be the focus of the finished g-free stuffing, so here's the rest of the recipe:

(Sure, I wanted to take a picture of the chicken right out of the oven, but I wasn't quick enough. So here's what it looked like, chicken dinner with g-free stuffing, dished up. )

Chop up the following and add to the cubed bread:
1 small onion
1/2 to 1 stalk celery
1 small cooking apple
6 dried apricots
1 small branch fresh Rosemary
(pull the leaves off the branch first)
several leaves of fresh sage

Then add: 1/2 to 3/4 cup Thompson raisins
salt and pepper (to taste)
Mix up thoroughly. Now you need some fat and some broth. For the fat, I drizzled some garlic olive oil in and mixed it up again. You can use whatever oil you prefer or have on hand. For the broth I used my own *chicken broth, about 1/2 cup. (see below) Once moistened, I stuffed half the stuffing into the bird, and placed the remainder in an oven safe dish to cook separately.
(Stuffing in a dish.)

*To make chicken broth, put the leftover chicken carcass into a crock pot (preferably), with onion, garlic and herbs and a bit of salt, and cover with water. Simmer on low for about 8 to 10 hours. Turn off and allow to cool. Strain into large casserole or saucepan, removing skin, bones, etc., and putting any pieces of meat you want back into the broth. Refrigerate, covered. When it's cold, remove the fat that's risen to the top. You now have fat-free broth you can use for a variety of things. To make your own broth cubes, spoon or pour broth into ice cube trays and freeze, then dump cubes into a freezer bag for later use as needed. Leave chicken pieces covered with enough broth to add veges and noodles for soup. Broth can also be frozen in a larger container to make gravy with later. Just add salt, pepper, and g-free thickener such as arrowroot flour or tapioca starch by dissolving same in some of the cold broth and adding to heated broth while stirring.


Part Two: gluten- and dairy-free pumpkin pie!

It's quite possible to buy canned pumpkin without additives these days, but I was cooking pure foods before the food companies started to smarten up, so I still buy pie pumpkins out of habit.


I just cut it up and cube it, cleaning away the peel and the seeds in the process. Then I boil it with a little salt and mash it, much as you would potatoes.

(Wash off the seeds, drain and dry out to keep for planting, or for crafts. You can also bake them coated lightly with oil and sea salt for snack food, but don't do this if you're fussy about your furnishings, because you WILL find slightly greasy seed husks in your couch.)

Once you have thoroughly mashed pumpkin, you can make your g-free pastry, then your pumpkin pie filling. The pastry recipe is in the post below; here's the recipe for the pie filling:

1 cup milk or milk alternative
(You can use whatever alternative you like that you can find in a gluten-free version... soy, rice, hemp or almond milk are all fine.)
1 and 1/4 cup mashed pumpkin
2 eggs
1/4 cup white sugar
1 tsp. ground cinnamon
1/2 tsp. ground ginger
1/4 tsp. ground cloves
1/2 tsp. sea salt

Now, the method is important... there's a couple of tricks to this that will make your pumpkin pie supreme, so read carefully. Mix the milk alternative and the pumpkin together till well blended. Separate the eggs. Slightly beat the yolks and add to the pumpkin mixture. Set the whites aside in a bowl big enough to take a beater. Measure 1/4 cup white sugar. Add the spices to the sugar. (By adding the spices to the sugar first and mixing well, the spices will better mix with the liquid ingredients.) Mix the sugar/spices into the pumpkin mixture. Beat the egg whites to soft peaks, then fold them into the pumpkin mixture.


Folding...


The pie goin' into a preheated 425 degree oven for 10 mins. Then turn down to 350 degrees for 30-35 mins.


The pie comin' out golden and if you insert a toothpick, it comes out dry.

*Note: this recipe made enough pie filling for one 9-inch and one 5-inch pumpkin pie, but yield depends on the depth and size of your pie plates.

So it's shaping up to be a pretty traditional Thanksgiving dinner this year. The family doesn't really care for turkey, so I'll get a free-range chicken and stuff it with my fruit & herb g-free stuffing. I'll either use my own chicken broth to mash some potatoes, or if I want some too, I'll use Yoso soy gluten- and dairy-free sour cream to mash them nice n' creamy. I'll make gravy using a g-free starch, and of course, some veges... probably peas and corn with this bunch, and a pickle dish with my own dills, B&B pickles, carrot and celery sticks, and maybe some spiced pickled crab apples and pickled pumpkin on there too... just for fun. ;o) Dessert.... yep, pumpkin pie. Except because of the eggs, I can't have any. But it's ok... while they're preoccupied with the pumpkin pies, I'll be digging into a homemade, g-free, apple cinnamon pie. There will be vanilla soy 'ice cream' served with either one. Mmmmm....

Hope you all have a fantastic, healthy, safe Thanksgiving with the people you love, and who love you. :)

Wednesday, June 29, 2011

PIE... with gluten-free crust!!

I had to find a good g-free way of making pie crust. I mean, I just can't let the fresh fruit season go by without making some pies for the family. The teen is gluten-free, so it was imperative to come up with a recipe that works, and amazingly, I did.

Now, you diabetic readers, avert your eyes. I had one small piece, and yes, it elevated my sugar, but not as much as I thought it would. Still.... this is pretty much for those in the family who can handle the sweet treat.

There are two ways of making this pastry. I made it the first time with almond flour in there, but I made the second one without. I notice that the pastry was better with the almond flour in there, and easier to handle too. But it works without. Here's the recipe:

1/2 cup brown rice flour
1/4 cup arrowroot flour
1 tsp. xanthan gum
1/4 cup chic pea flour
almost 1/4 cup almond flour (optional)
1/2 tsp. sea salt
1/4 to 1/3 cup cold shortening, chilled
cold water

(Yes, there was more xanthan gum in the recipe before, but I really don't think that much is necessary, so I cut it down to one tsp.)  At first i put all the dry ingredients into my food processor with the dough blade in there and pulsed it to mix.   But since then I've just been mixing it by hand with a good ol' fashioned pastry blender.  I find it's just better to keep it simple.  I put the all-vegetable shortening in the fridge before doing this. It really needs to be cold. If you aren't vegan, you can also use butter I'm thinkin'.  Anyway, I cut 1/4 cup off it the first couple of times and it worked fine, but then one batch came out kinda dry, and if you add too much water, it makes the pastry tough. So cut between 1/4 to 1/3 cup of shortening into cubes. Adding them 1 - 2 at a time and blend till you have a coarse crumbly mix.  Then I added a little cold water. It doesn't take much... add carefully, but err gently on the wet side rather than the crumbly side. You can always add more flour.  My BIL said he couldn't even notice the difference between my gf pastry and regular pastry. :) It really turned out nice.

Anyway, the machine only does so much, so you'll have to finish it by hand anyway. I made a ball of it, and set it on my pastry board, which was covered first with a piece of waxed paper and a light coating of arrowroot flour. I turned the pastry in the arrowroot, then placed another piece of waxed paper on top. Roll.

It rolls out really very well. When you have it the size and thickness you like (measure against the pie plate to make sure), peel off the top layer of waxed paper, turn the pie plate upside down over the pastry, slide your hand under there and turn. Gently remove the remaining piece of waxed paper and carefully shape the pastry to the plate, mending any splits or holes as needed with edge pieces. Trim carefully, fix up the edges the way you like, and fill. Use the leftover bits of pastry, rolled out again between waxed paper, to make shapes for the top. I used cookie cutters for this ~ worked great.
I used hearts for the first pie, little stars for the second. I tried to upload that picture, but this thang isn't working right. But just picture all those wee stars all over a pie!

The fruit mixture, of course, is a matter of choice and taste. Strawberry and rhubarb seasons coincide here, so it's a natural choice. I just added a few spoonfuls of brown sugar, a squeeze of lemon juice just 'cuz, and 3 tablespoons of the arrowroot flour. Use the sweetener and starch of your choice, not to mention the fruit! Some folks really like the raspberry/rhubarb mix too. And with the long weekend coming up ~ 1st of July here, 4th of July for my American friends... well, for you guys, picture an apple pie all covered with stars! I mean, Mom, there is nothing more American than Mom, apple pie and stars! :)

I hope this g-free pastry works as well for you as it does for me!

Thursday, June 23, 2011

That Yummy Asian Theme!

I've been eyeing those lettuce "wraps" for awhile now. Seems like a great way to lower the carb content of a meal. And while I'm sure they're intended for cold salad type foods like egg, chicken or tuna salad, I was really tempted to try them as a wrap for warm food.

And so, there I was making myself a stir fry. I started by putting some mushrooms, garlic curly thingees (Um.. they have a name but see if I can remember what it is. Anyway they pop out of the middle of the garlic plant and you remove them so the nutrition will go into the bulb. They are quite edible.), some green onion, celery, asparagus, broccoli and red pepper into a small skillet to saute. Then I threw in some bean sprouts and about 1/2 cup cooked brown rice. Now, if you eat meat you could also put some lean strips of beef, chicken, etc. in there. I had some leftover tofu and while it's not my fave thing, I cut it into cubes and marinaded it in some tamari sauce with a splash of sesame oil for about ten minutes. I put the cubes of tofu into the pan first to saute a bit, then I just poured in the marinade to give the whole thing a bit of an Asian flavour.

Then I spooned it into the lettuce wraps. They made little boats for the stir fry that you can either eat neatly with knife and fork, or, with napkin on hand, pick up and enjoy! This meal is gluten-free, dairy-free and low in carbs for those watching their blood sugar. A yummy but healthy alternative to gluteny, carby grain wraps!!


Another great summertime meal! Shish~ka~bobs!! I had a package of natural stew beef in the freezer that I needed to use up, but the weather is just too warm for stew. So I made sure the pieces were cut small enough, then I put them in a marinade made in a small, glass bowl with about 1/2 cup g-free pizza/pasta sauce into which I added a good squirt of agave nectar, herbal vinegar (or lemon juice), some tamari sauce and a squirt of sesame oil. (Yes, we like that Asian influence, but you can make yours to your taste with other sauces and oils!) I made sure all the pieces of beef were covered in some marinade, covered the bowl and put it in the fridge for a little over 3 hours. This tenderizes the meat beautifully. I cleaned up some mushrooms and cut up some peppers and put all on bamboo skewers. (If you use any wooden skewers, remember to soak them in cold water for 20 mins. before you put the food on, so they won't burn on the bbq.) To go with these I made g-free fried rice. (The recipe for this is on an earlier post.)

Alas, that was a big package of stew beef and there were leftovers. To change it up for the fam, I made them Lo Mein noodles a couple of nights later with the warmed up beef, mushrooms and pepper pieces. Again an Asian theme, I used g-free rice spaghetti for this. While it was cooking I sauteed some more mushrooms, peppers and chopped green onion, then I added some organic chicken broth ~ about 1/2 cup. You can add more veges here too, such as snow peas, broccoli... whatever you like. Use some more of the broth to dissolve some g-free starch. I used tapioca starch and used it to thicken the veges and broth in the pan. Then I added the cooked, drained noodles, about 2 tablespoons of tamari sauce and yes, that splash of sesame oil for the right flavour. I turned it down to low and covered it while I warmed up the beef in the microwave. Then I served it all up.

Friday, June 17, 2011

My Stuffed Mushroom and Other Simple G-Free Meals

I found this giant mushroom at my local health food store, but I've also seen them in grocery stores. I had to have one. I cut up veggies ~ asparagus, green onion, garlic, celery, ordinary mushroom, red pepper, etc., and I nuked a small, red-skinned potato which I cut up, unpeeled. All went into a small mixing bowl where I added dressing: 1 tsp. garlic olive oil, dash of Tamari sauce, a little g-free dijon mustard, pepper, dried sweet basil and parsley and a sprinkling of fake parmesan cheese. Mix well.

I washed the mushroom and scooped out the gills. Then I stuffed it with the veggie mixture.

It would probably be best baked in a covered dish, but it was too hot to put the oven on, so I put it in a little enamel frying pan, covered it and cooked it over low-medium heat for about 20 mins. The bottom got blackened a bit, but the stuffing was steaming and it was all still really, really good. You could serve this with a crisp green salad, but I just put some sliced black olives and a dill pickled on my plate and enjoyed.


I needed to come up with a simple lunch for the teenager who is also now gluten-free. I had some leftover white meat from a roasted organic chicken, so using g-free mayo and adding some salt, pepper, dried parsley and sweet basil, I whipped her up some chicken salad. But how to serve it in an attractive way that was also yummy? My eyes fell on a package of blue corn chips, so I laid some out on the plate and put the chicken salad on top, then stuck one corn chip into it. My girl likes cucumber dipped in French dressing and we had some g-free dressing at hand, so this completed her lunch. She said, "Mom, some of my meals look like something I'd be served in a restaurant." Hey, cool. :)

We've gotten away from the meat and potatoes model in the last long while, but sometimes it still gets the job done. I made some natural beef patties and since it's asparagus season here, I fried some of that, along with some mushrooms in just enough garlic olive oil to coat the pan, and I nuked a nice little red skin potato. Served with homemade g-free catsup and some butter for the spud, the teen was smiling when she was through. :)